Add up width × height of every surface you are going to cover.
Couldn't load pickup availability
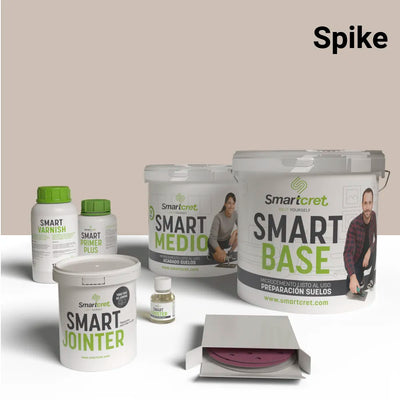
Includes Smart Base, Smart Liso, Smart Varnish, Smart Booster, Smart Jointer and Smart Primer PLUS, sanding discs and instructions · Free shipping, delivery time shown at checkout · 14-day returns
What arrives at your home7 products · 16.0 kg
That is 16.0 kg and the carrier leaves it at the street door, not inside your home. Have someone to help you carry it up.
Product
Qty
Format
Smart Base
1 ×
8 kg
Smart Liso
1 ×
3 kg
Smart Varnish
1 ×
1 L
Smart Booster
1 ×
50 g
Sanding discs
11 ×
g40 · g220 · g400
Smart Jointer
1 ×
1,5 kg
Smart Primer PLUS
1 ×
0,5 L
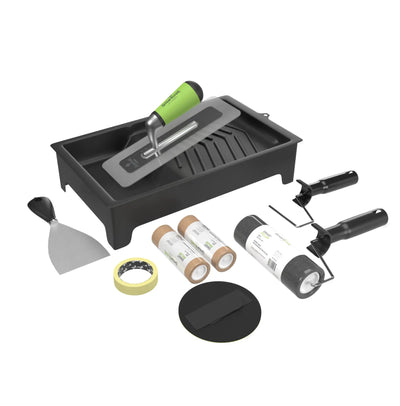
Tools are sold separately — trowel, roller and bucket.
See them →
✓ FREE shipping. Delivery times depend on your country; you will see the estimate at checkout.
One kit to renovate the kitchen splashback, walls and countertop without removing the tiles or replacing the units. Choose the surface, the size and the colour; the kit arrives complete, with instructions. The tools are sold separately and the floor has a kit of its own.
Colour: swatches and NCS equivalences are indicative. The actual result may vary depending on your screen, the lighting of the space, the surface and the application.
The kit includes every product of the Smartcret system your surface and square metres need: primer, Smart Base, the finishing microcement (Smart Liso for walls and furniture, Smart Medio for floors), the Smart Varnish sealer and the sanding discs, with step-by-step instructions. You have them listed one by one, with quantities, in the “What arrives at your home” block, below the buy button, which changes with the metres and the surface you choose. Tools (trowel, roller, tray and sanding glove) are sold separately: you have them all in the Smart Tools tool kit. The microcement comes ready to use and pigmented; in the bathroom, kitchen, floor, outdoor and furniture kits the varnish is mixed with Smart Booster, which is included; for walls and fireplaces the varnish is used on its own.
Which m² kit do I need?
Measure the surface to be covered: for walls, width × height of each section; for floors, worktops or furniture, length × width of each face. Subtract only large openings and add up the total. Choose the kit whose m² is equal to or greater than that total; if in doubt between two, go for the larger one. The “Work it out here” link, below the Metres option, does it for you.
Can I return or exchange the kit?
Yes: you have 14 days from delivery for exchanges and returns. Return shipping is at the customer’s expense and your order number is enough for us. See the full conditions.
Is it right for my surface?
Each kit is formulated for a specific project and surface: you will find it in the kit name and in the “Surface” option of the selector. If your surface is different (for example, plasterboard instead of tiles), choose it in the selector and the kit adjusts. If your project is another room, you have all eight kits in the kit collection. First repair any loose piece, active crack or damp problem.
Description
What it is
Microcement to renovate the kitchen without removing the tiles or replacing the units: splashback, walls and countertop.
It goes on top of the existing surface in a thin layer, so there is no demolition and no rubble. You choose the surface you have and the kit adapts to it.
Twenty colours, all with a matt finish. The kit arrives complete and with step-by-step instructions.
What arrives. Primer, microcement, varnish, sanding discs and step-by-step instructions. The tools (trowel, roller and tray) are sold separately, in the Smart Tools kit.
Coverage. Each size in the dropdown covers the area stated in its name, counting both coats.
Storage. Keep unopened containers somewhere cool and frost-free.
On the countertop. It handles daily use, water and grease, but not a hot pan or pot set down directly on it, and no cutting on the surface.
The floor is not part of this kit. It needs different preparation and a different thickness, and it has a kit of its own.
Properties
Properties
Seamless and continuous. Applied in a thin layer over the existing surface, so it does not noticeably raise the level.
Twenty colours. All with a matt finish, which comes from the varnish included in the kit.
Ready-to-use. The microcement comes pre-mixed: no measuring out or mixing aggregates.
Adhesion on difficult surfaces. The primer is what lets you apply it over non-absorbent surfaces such as tile.
Cleans with water and mild soap. No abrasive products or metal scourers, which scratch the varnish.
Uses
Uses
Splashback between wall and base units
Kitchen walls
Countertop
Island and peninsula
Breakfast bar and dining area
Application
How to apply it
It goes on top of what you already have, with no ripping out and no rubble. The kit includes all the products and step-by-step instructions; the tools (trowel, roller and tray) are sold separately.
Preparing a glazed surface. On tile or porcelain the surface is glazed and non-absorbent: first fill and level the grout lines with Smart Jointer, then apply Smart Primer PLUS, the maximum-adhesion primer.
Preparing a porous surface. On plasterboard, plaster, cement or concrete the surface is porous and there are no grout lines to fill: apply the primer for absorbent surfaces directly.
Two coats of microcement. Apply with a trowel in a thin layer, letting it dry between coats. The second coat is the one that sets the final look.
Light sanding. With the disc included in the kit, to even out the surface before sealing.
Varnish. This is the layer that protects and the one that gives the matt finish. Apply every coat the instructions call for, without skipping any.
No special tools or previous experience needed. Total time depends on the surface area and on the drying times between coats.
Technical data sheets
Technical data sheets for the products in the kit
These are the technical data sheets for every product in the kit. Which ones you receive depends on the surface you choose.